Guide to Upload a WordPress Website to VPS
I. Guide to Purchasing VPS at Vultr
1. Registering a Vultr Account
You'll need a Visa card and a Gmail account.
Click on the following link to register:
REGISTER AT VULTR TO GET A $50 DISCOUNT
2. Creating a VPS
After successful registration, go to the Products section and click Deploy New Server
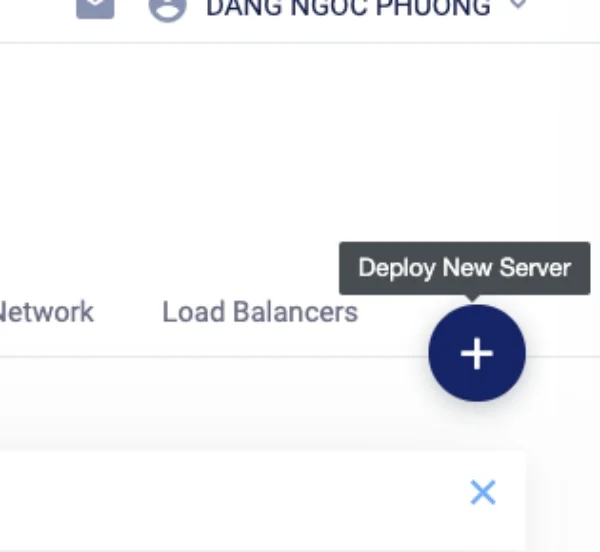
Next, choose your type of server. Currently, Vultr offers you four types: Cloud Compute, High Frequency, Bare Metal, and Dedicated Cloud. I'll explain each in a different post. At the moment, I'm using Cloud Compute.

Next, choose the server location. If your website users are in Vietnam, you can select the Server Location as Singapore.
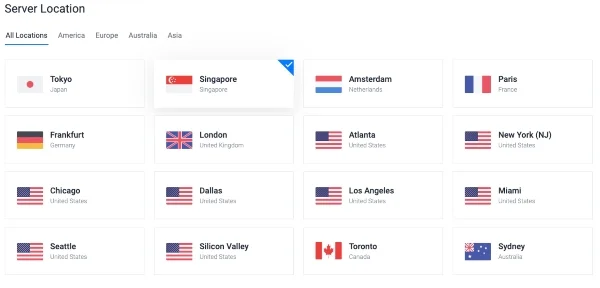
Next, select an operating system for your VPS. I usually use CentOS. Here, I'm choosing CentOS 7 x64.

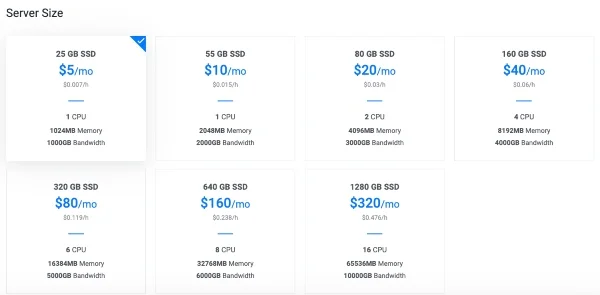
Then, choose a configuration for the VPS. If your Website gets under 1000 hits per minute according to Google Analytics, then for the Cloud Compute type, $5/month should be enough.
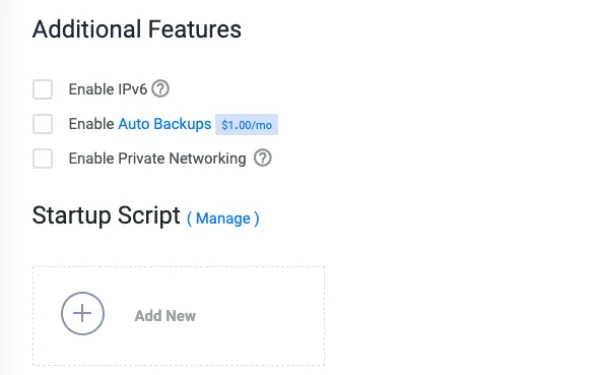
Next, there are some optional settings if you’d like IPv6, or automatic monthly VPS Backups.
Finally, name your VPS, choose anything that helps you remember and avoid confusion with any other VPSs you create later. After you set the name, click Deploy Now to create it.

II. Installing Control Panel DLEMP
After creating the VPS, remember to wait about 15 minutes for Vultr to initiate the service according to your request.
Now it's time to install a Control Panel to manage the Website on your VPS. There are many types of Control Panels such as Hocvps, Vestacp, Dlemp ... but today I will guide you to install Dlemp.
1. SSH into the Server
To install, you need to SSH into the Server.
There are multiple ways to SSH into a Server. Most of you probably use Win 8 or above, or Mac OS, so I'll guide the fastest SSH method.
Open your Win or Mac terminal and type the following command:
ssh root@ip_server //ip_server là ip của vps các bạn đã tạo
Type 'yes', then enter your password, and that's it.
After successfully SSHing, you're ready to install Dlemp.

2. What is Dlemp?
Dlemp is an automatic script installation and optimization tool for the VPS. With a few simple commands, your VPS will be ready to operate immediately.
Main functions of Dlemp:
- Supports the latest nginx
- PHP-fpm with FastCGI
- PHP version choice upon installation, supports the latest PHP.
- Using MariaDB instead of MySQL
- Easy SSL (https) installation
- Installs phpMyAdmin
- Supports Zend opcache, Memcached, Google Pagespeed
- And many more features...
3. Installing Dlemp
Run the following commands:
// Nếu bạn dùng version tiếng việt
curl -L https://script.dlemp.net -o dlemp && bash dlemp
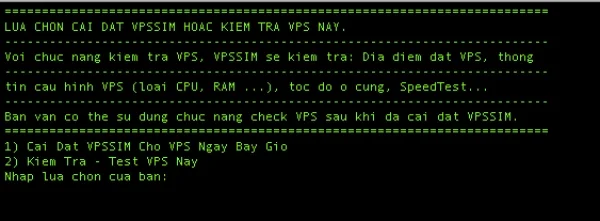
Choose to install Dlemp for VPS immediately by entering '1'.
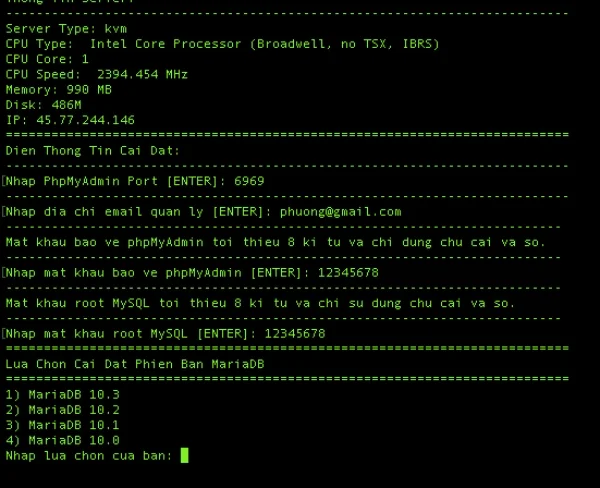
Next, input port information, the admin's email address, and the password for phpMyAdmin. Note that the password can only contain numbers and letters.
Next, choose your MariaDB version to continue with installation. Here, I'm choosing MariaDB 10.3 so I enter '1'.
Next, choose the version of nginx. I'm selecting Nginx Mainline Version so I'll input '1' to proceed. Dlemp doesn't use apache but nginx. If you wonder what nginx is, you can read this post.
After successful installation, the Server will restart. Wait for about a minute and then SSH back in.

After completing the installation, if you want to see the detailed information, visit the following link: http://ip_server/svm for checking.
// Đăng ký tài khoản doanh nghiệp (lưu ý chạy lệnh này sau khi đã cài đặt xong dlemp để nâng cấp lên phiên bản doanh nghiệp
DLEMP----FreeLicense----Business
To use dlemp, run the following commands:
dlemp
Now you can celebrate your successful Dlemp installation. You've got to add a Website to it now.
Press '1' to choose 'Add Website & Code'
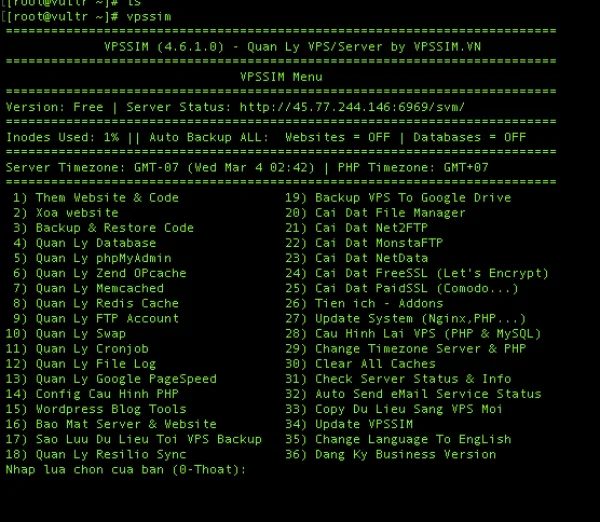
Press '1' to choose 'Add Website'
Enter your domain name and hit Enter. It will ask if you want to create a database for this domain. Answer with 'Y'.
Note the information for the created database and replace DB_NAME(Domain Name), DB_USER(Username), DB_PASSWORD(Password) in your website source code's wp-config.php file.
Log into phpmyadmin on localhost to export your website's database.

If you don't know how to use phpmyadmin, check out my post.
Next, log onto phpmyadmin on the VPS. If you forgot the path, SSH into the VPS and type 'dlemp', then choose '5. Manage phpMyAdmin' to review the path to phpmyadmin.
Login to the phpmyadmin link and input the username to access the database.

Proceed to import the previously exported database into the VPS database. Select the database to import and pick the import option to find your file.
III. Pointing domain to VPS
Access to your Domain Control Panel, where you bought your domain. In this post, I'm using the example where I bought the domain from Pavietnam.
Log into the Pavietnam-provided management page, then navigate to 'Services' and choose 'Domains'.
Choose 'Configure' and add records as the image shown below.

Replace the IP address with your VPS address.
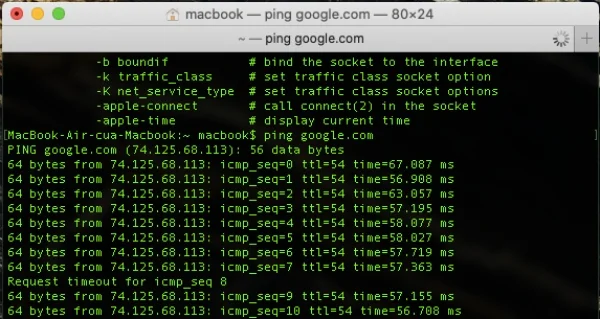
After configuration, you may have to wait a while, then open a terminal and ping your domain to check if you've configured correctly. If pinging shows your VPS IP address, that means you've successfully pointed your domain.
You don't have to use Pavietnam DNS, you can use Cloudflare's. I'll guide that in another post.
IV. Compressing source code files and uploading the website to VPS by FileZilla, WinSCP
Compress your whole source code folder into a zip file, then use FileZilla or WinSCP to upload your zipped source code.
After putting zip files in the path /home/your_domain, clear out the 'public_html' folder.
Next, SSH back into the VPS and type the following command:
cd /home/ten_mien_cua_ban/
Continue using the following command to unzip the uploaded file.
unzip ten_file.zip
Rename the decompressed folder to 'public_html' and that's it.
Submit feedback
Your email address will not be made public. Fields marked are required *
Search
Trend
-
What is Black Myth: Wukong? Detailed Guide on System Requirements and Gameplay
08-21-2024 . 1k view
-
Call of Duty: Black Ops 6 - Intense, Mysterious, and Surprising Warfare
09-02-2024 . 947 view
-
The "End of Life" for Windows 10: A Massive E-Waste Threat and Sustainable Solutions
08-18-2024 . 891 view
-
The simplest and fastest way to log into the Chinese TikTok, Douyin.
01-10-2022 . 869 view
-
Blog sites that will accept AI generated content
07-26-2024 . 851 view




0 feedback