Detailed Guide to Updating Drivers for Dell Laptops: Ensure Optimal Performance
Is your Dell laptop experiencing slowness, screen issues, or unstable peripheral device performance? The issue might be due to outdated drivers. Don’t worry, this article will show you how to update your Dell laptop’s drivers in the simplest and most effective way, whether you’re an experienced user or a beginner.
Why Should You Install Drivers for Your Dell Laptop?
Installing drivers for your laptop not only helps it run more smoothly but also offers several other benefits, including:
- Maximizing the hardware features and performance of your computer or laptop.
- Installing the correct and complete drivers ensures system stability and minimizes errors during use.
- A computer with only hardware components cannot function. Each hardware component needs a driver to be easily managed and controlled.
How to Check Which Drivers Your Dell Laptop Is Missing
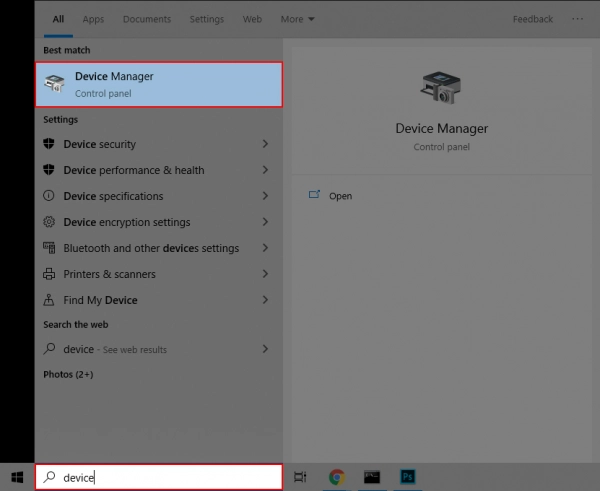
Step 1. Press the Windows key > Type Device Manager in the search box > Select Device Manager.
Step 2. The Device Manager window will appear. If your laptop is missing any drivers, a yellow warning icon will appear next to the device name.
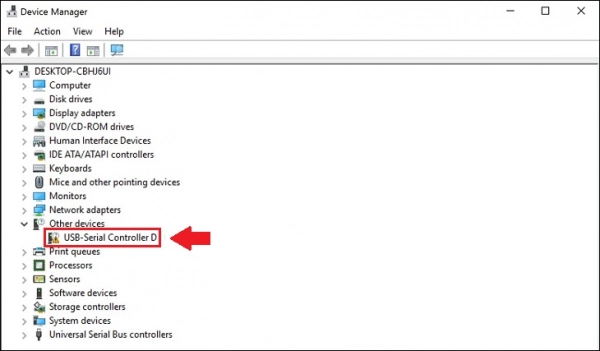
Below are the names of some common drivers you might not know:
- Display adapters: Graphics card drivers (integrated and dedicated cards).
- Firmware: Dell BIOS drivers.
- Network adapters: Network drivers (LAN, WiFi).
- Sound, video and game controllers: Audio drivers.
- Universal Serial Bus controllers (USB): USB drivers.
Step 3. You can check if a driver needs updating by double-clicking on any driver. For example, double-click on Display adapters > Then double-click on NVIDIA GeForce GTX 1650 (graphics card driver).
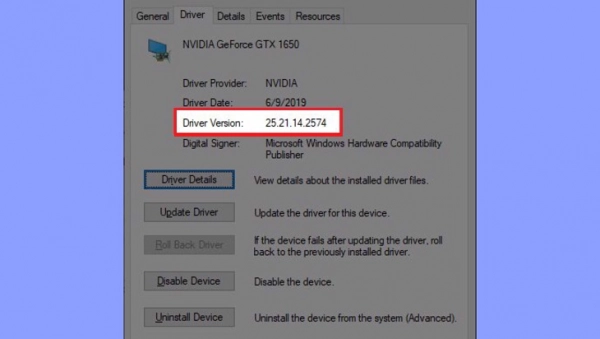
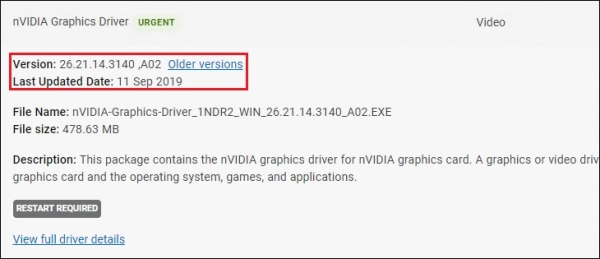
Step 4. Select the Driver tab and look at the Driver Version. This is the driver version number. You can compare it with the NVIDIA GeForce GTX 1650 driver on Dell’s official website to see if an update is necessary.
Check Your Dell Computer’s Service Tag to Download the Correct Driver
1. What Is a Service Tag?
A Service Tag is a string of characters that comes with every Dell computer sold. It helps users accurately find the drivers they need to install for their laptop. With this string, users can track information about the product such as:
- Place of manufacture.
- Computer configuration.
- Remaining warranty period and available support services.
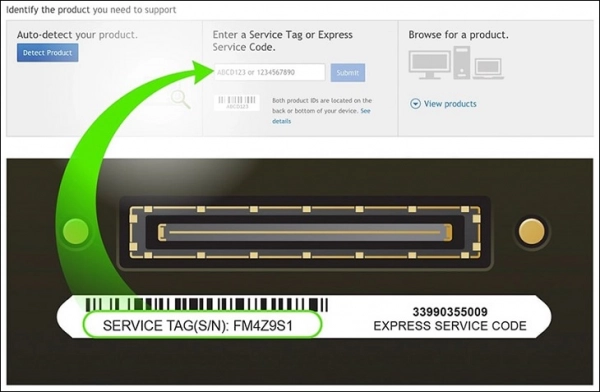
2. How to Check the Service Tag on a Dell Computer
Method 1: Check the number on the back of the product. For Dell products, the back always has a Series Tag.
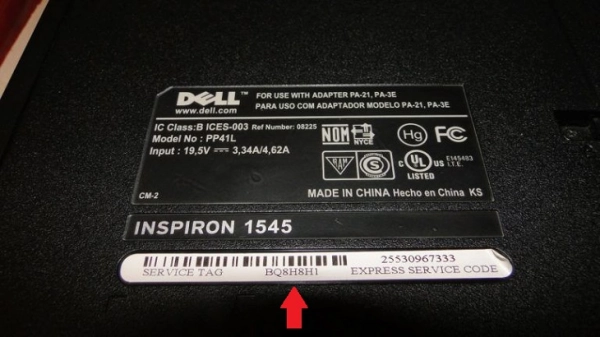
Method 2: Some laptops have a Service Tag printed on paper, which may fade over time. If this happens, users can check it using the following steps:
- Step 1. Press Windows + R > Type CMD > Press Enter.
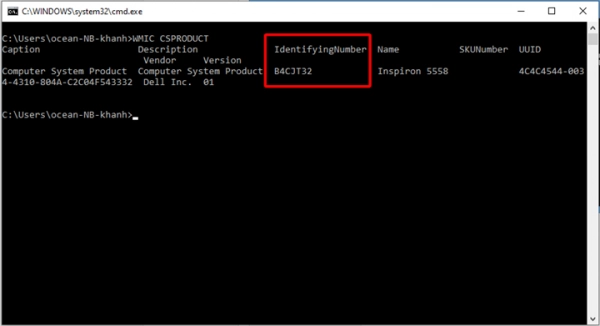
- Step 2. In the CMD window, type WMIC CSPRODUCT > Press Enter to see the Service Tag under IdentifyingNumber.
Manual Guide to Download and Update Dell Drivers
Pros:
You have control over the installation process and can skip unnecessary drivers that may slow down your computer.Cons:
Requires knowledge about drivers (driver names, types, purposes, and installation order).
Step 1. Access the Dell Driver download page HERE.
Step 2. Enter your Dell laptop’s Service Tag in the search box > Press Search to go to the Download Driver page.
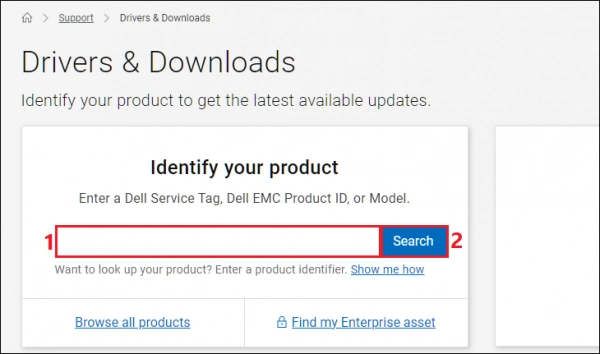
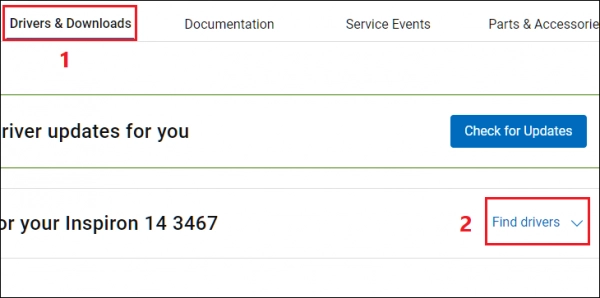
Step 3. Click on Drivers & Downloads > Select Find Drivers.
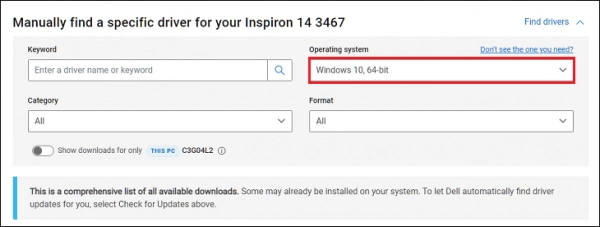
Step 4. Under Operating system, choose the operating system running on your laptop.
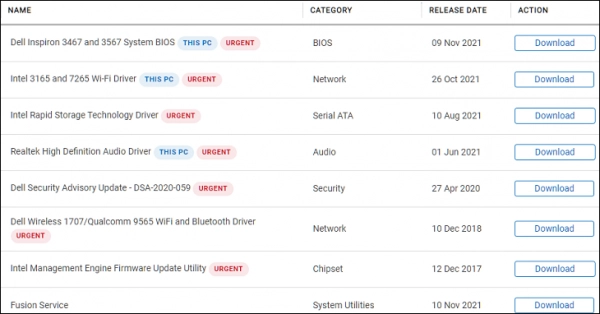
Step 5. Select the driver you need > Press Download to download it. Here are some common driver names:
- Graphics Driver: Refers to the graphics card driver.
- Intel Rapid Storage: Storage management driver.
- Ethernet, WiFi: Network drivers.
- Memory Card: Driver for reading phone or camera memory cards.
- BIOS: BIOS driver.
- Audio: Audio driver.
Step 6. After installation, the laptop will prompt you to Restart to activate the new drivers.
Automatic Guide to Download and Update Dell Drivers
Step 1. Access the Dell Driver download page HERE.
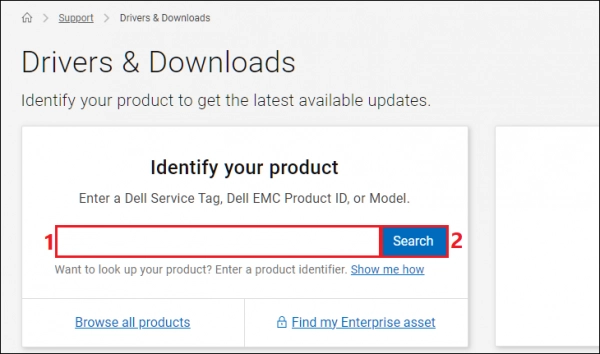
Step 2. Enter your Dell laptop’s Service Tag in the search box > Press Search to go to the Download Driver page.
Step 3. Click on Drivers & Downloads > Select Check for Updates.
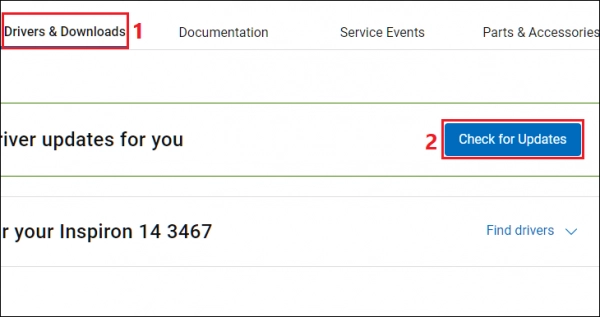
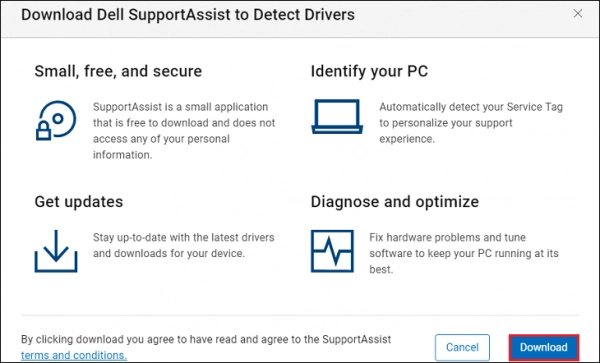
Step 4. Click Download to download the Dell SupportAssist application.
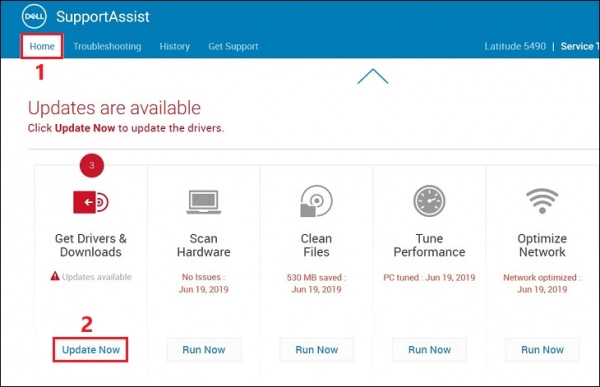
Step 5. After downloading, select the Home tab to see which drivers need updating > Select Update Now.
Step 6. In the driver window, select Install to download.
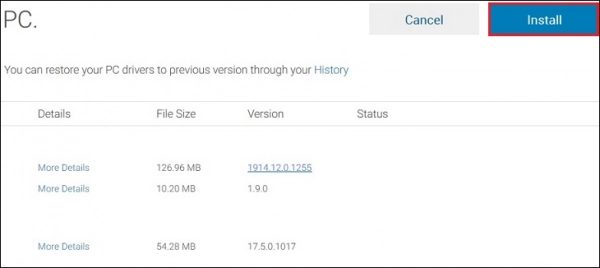
Step 7. The system will automatically install the drivers, so no intervention is required. After installation, the laptop will prompt you to Restart to activate the new drivers.
That's how you can correctly, safely, and quickly install drivers for your Dell laptop. If you have any questions during the process, feel free to leave a comment below!
Submit feedback
Your email address will not be made public. Fields marked are required *
Search
Trend
-
What is Black Myth: Wukong? Detailed Guide on System Requirements and Gameplay
08-21-2024 . 1k view
-
The simplest and fastest way to log into the Chinese TikTok, Douyin.
01-10-2022 . 1k view
-
Blog sites that will accept AI generated content
07-26-2024 . 1k view
-
Call of Duty: Black Ops 6 - Intense, Mysterious, and Surprising Warfare
09-02-2024 . 1k view
-
The "End of Life" for Windows 10: A Massive E-Waste Threat and Sustainable Solutions
08-18-2024 . 948 view




0 feedback