Fixing the "Out of Memory" Error: Simple Solutions for Chrome
Are you facing the "Out of Memory" error while using Chrome? Don’t worry—this article will help you understand the cause and provide simple solutions to fix this issue.
What is the "Out of Memory" Error?
The "Out of Memory" error is a message that appears when your system or computer’s RAM runs out of memory to execute tasks or manage data. In the case of Google Chrome, this message appears when Chrome no longer has enough memory to handle additional browser tabs or other tasks.
The main causes of the "Out of Memory" error usually include:
- High memory consumption: Opening too many browser tabs or running resource-intensive websites and web applications can fill up the browser’s memory.
- Using extensions: Browser extensions can also consume memory and contribute to the "Out of Memory" issue if not properly managed or if they are incompatible.
- Using a low-spec computer: If your computer has low specifications and limited RAM, you are more likely to encounter the "Out of Memory" error.
- Website blocked by firewall or network filter: The website you are trying to access may be blocked by a firewall or network filter.
Simple Solutions to Fix the "Out of Memory" Error
To fix the "Out of Memory" error in Chrome, you can try the following solutions:
- Close unnecessary tabs: If you have multiple browser tabs open, close the ones you don't need to free up memory.
- Disable or remove unnecessary extensions: Check if there are any extensions installed that you no longer use. If so, disable or remove them to reduce memory usage.
- Clear browser cache: Regularly clearing your browser cache helps ensure it doesn’t become too large or corrupted.
- Check and manage temporary files: Manage the temporary files on your computer to ensure they don’t exceed limits.
- Restart the browser: Restarting the browser can resolve temporary memory issues.
- Upgrade your RAM: If your computer has low specifications and frequently encounters the "Out of Memory" error, upgrading your RAM could be a solution.
- Check and manage temporary files: Make sure the temporary files on your computer don't become excessively large.
Using the Registry to Fix the "Out of Memory" Error
To fix the "Out of Memory" error on your computer by editing the Registry, follow these simple steps to improve system performance. Here’s a detailed guide:
Step 1: Press the `Win Key + R` on your keyboard to open the Run dialog box, then type "Regedit" and press Enter to open the Registry Editor.
Step 2: In the Registry Editor window, navigate to the following path:
HKEY_LOCAL_MACHINE\SYSTEM\CurrentControlSet\Control\Session Manager\Memory Management
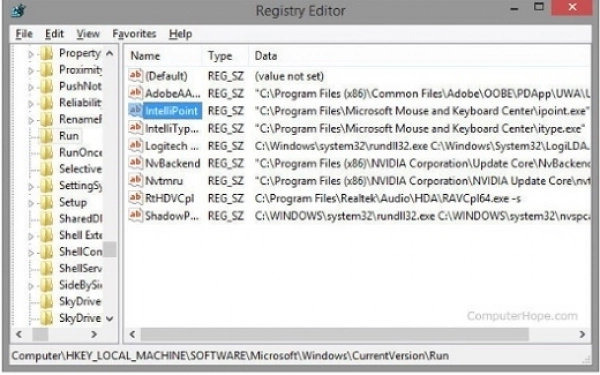
Step 3: Next, locate and double-click on "ClearPageFileAtShutdown" in the list on the right, or right-click and select Modify.
In the Edit DWORD (32-bit) Value dialog box, ensure that the value in the "Value data" field is set to "0" (without quotes). Click OK to save the changes.
Step 4: Finally, restart your computer and check if the error has been resolved.
Fixing Driver Issues on Your Computer
If you want to resolve the "Out of Memory" error by fixing driver issues on your computer, follow these steps:
Step 1: Open Device Manager on your computer.
Step 2: In Device Manager, click on the "Scan for hardware changes" button.
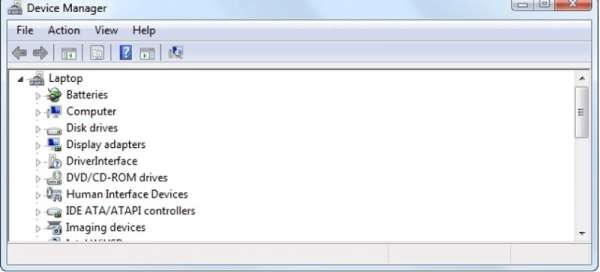
Step 3: After scanning for hardware changes, the computer will automatically check the installed drivers. If it detects that a driver is outdated or incompatible, it will prompt you to update to a newer version.
Step 4: Follow the instructions to update the specific driver. Typically, you can select "Update driver" and follow the instructions to download and install the latest driver version from the manufacturer’s website or another trusted source.
Step 5: Once you have successfully updated the driver, restart your computer to apply the changes.
Optimizing Your Operating System for Best Performance
To optimize Windows and effectively use your RAM, you can perform the following steps:
Step 1: Right-click on the "My Computer" icon on your Desktop and select "Properties" from the menu.
Step 2: In the System Properties window, go to the "Advanced" tab, and under the "Performance" section, click on the "Settings" button.
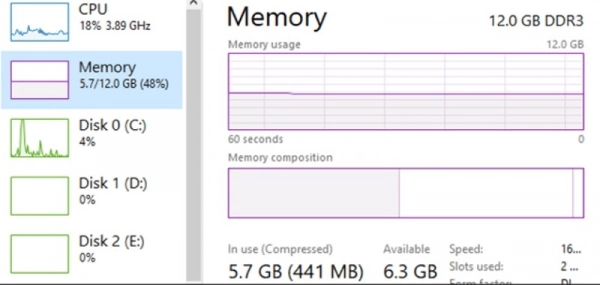
Step 3: In the Performance Options window, you will see several options related to system performance. To optimize RAM, you can choose "Adjust for best performance." If you want to keep some effects, you can click on the "Custom" option and select the effects you want to keep. Once done, click "OK" to save the changes.
Step 4: Finally, restart your computer to apply the performance tweaks and changes.
In addition to optimizing your operating system, removing unnecessary programs and applications from your device is another important step to optimize RAM usage. When using a new computer or after upgrading the operating system, some programs may be automatically installed.
If you do not need these programs, consider uninstalling them. This helps to significantly reduce the memory load, improve overall computer performance, and fix the error more effectively without affecting your user experience.
Submit feedback
Your email address will not be made public. Fields marked are required *
Search
Trend
-
What is Black Myth: Wukong? Detailed Guide on System Requirements and Gameplay
08-21-2024 . 1k view
-
The simplest and fastest way to log into the Chinese TikTok, Douyin.
01-10-2022 . 1k view
-
Blog sites that will accept AI generated content
07-26-2024 . 1k view
-
Call of Duty: Black Ops 6 - Intense, Mysterious, and Surprising Warfare
09-02-2024 . 1k view
-
The "End of Life" for Windows 10: A Massive E-Waste Threat and Sustainable Solutions
08-18-2024 . 943 view




0 feedback