If you're struggling with the path every time you upload code to Hosting, it could be because your source code locally hasn't been running with a virtual domain name. To avoid unnecessary problems like that, you should configure a virtual domain name right away. Read the article below for details.
I. Why configure Virtual Host?
When running a website project, you have to type http://localhost/myproject/ in the browser, this looks ugly and inconvenient if we are using a root path of /myproject/include/file.php, moreover, it's also unnecessarily long because it includes the project name.
Configuring Virtual Host also helps you later when you upload your website to hosting, vps ... so you don't have to reconfigure the path.
The solution to the above problem is that we will configure XAMPP so that it can run multiple, neater domains and can use the root path in a more convenient way.
We can also use this Virtual Host configuration method to configure running multiple domains on the same server.
II. Configuring Virtual Host
1. Working with the httpd.conf file
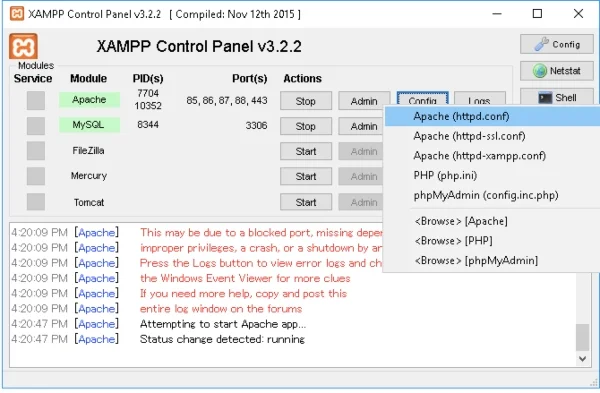
Open the file C:\xampp\apache\conf\httpd.conf with an editor, notepad is fine, or directly access the file from XAMPP as shown below.
Find the following line and remove the comment at the Include line by removing the #
# Virtual hosts
# Include conf/extra/httpd-vhosts.conf
The content after removing the comment
# Virtual hosts
Include conf/extra/httpd-vhosts.conf
The httpd.conf file will embed the httpd-vhosts.conf file when it runs.
2. Working with the httpd-vhosts.conf file
Open the file C:\xampp\apache\conf\extra\httpd-vhosts.conf with an editor.
Add the following code
ServerAdmin [email protected]
DocumentRoot “C:/xampp/htdocs/”
ServerName demo.local
ErrorLog “logs/error.log”
CustomLog “logs/access.log” common


Options FollowSymLinks
AllowOverride All
DirectoryIndex index.php
Require all granted
Allow from all
Explanation:
- : a tag pair that denotes the beginning and end of a Vhost declaration. One small note is that if any of you changes the port of Apache (8080,81, etc.) then you also have to change the number 80 according to the port you have switched to. Here, I have changed the port of Apache to 8080. You guys adjust it to your corresponding configuration port.
- DocumentRoot: a keyword declaring the path of the directory that will be called when a user accesses the configured domain. This path can be in any partition. I set my website according to the path C:/xampp/htdocs/myproject
- ServerName: the domain you want to set (type thaotrinh.dev:8080 on the url and it will display the websites)
- : a tag pair used to grant access to directories. If the directory is not granted access, you will encounter a 403 error as you try to access it. Your directory path can be a regular expression. If you are not familiar with Regex, you can use the directory path similar to the declaration in DocumentRoot or refer more at: http://httpd.apache.org/docs/2.4/en/mod/core.html#directory
- ServerAlias: a substitute name for the server name (optional declaration)
- ErrorLog: path to the error log file, errors will be viewed from here (optional declaration).
- CustomLog: path to a Uri log file when the user makes a request (optional declaration)
- Myproject: the name of the directory storing your source code.
Note after working with 2 files httpd.conf and file httpd-vhosts.conf, you need to restart apache.
3. Working with the hosts file (DNS registration for the domain)
Open the file C:\Windows\System32\drivers\etc\hosts using Notepad or any editor.
Note that this hosts file must be opened with administrative rights to be saved.
At the end of the hosts file, add the following code
127.0.0.1 demo.local
Explanation:
- When you type the address demo.local:80, first, your computer will prioritize to find the IP address of that domain within the hosts file of the operating system. If not available, it will seek the IP address of this domain via DNS servers on the Internet. Because you have declared it in the hosts file, it will use the declared IP address right away. Here, IP address 127.0.0.1 points to the accessing machine (that's your machine - if configured on the server then it's the server machine itself). You can use IP addresses from 127.0.0.1 -> 127.255.225.254, these all point to your machine (the entire range, not just 127.0.0.1).
Now you can open your browser and type in the address bar, replace the ugly localhost line with a domain of your own, and that's it. In the above example, it's demo.local.

Ngoc Phuong
Web Developer
Thank you for visiting my website. My name is Ngoc Phuong, and I have over 10 years of experience in website development. I am confident in stating that I am an expert in creating impressive and effective websites. If you need a website designed, please feel free to contact me via email at [email protected].
Submit feedback
Your email address will not be made public. Fields marked are required *
Search
Trend
-

What is Black Myth: Wukong? Detailed Guide on System Requirements and Gameplay
08-21-2024 . 1k view
-

The simplest and fastest way to log into the Chinese TikTok, Douyin.
01-10-2022 . 1k view
-

Blog sites that will accept AI generated content
07-26-2024 . 1k view
-

Call of Duty: Black Ops 6 - Intense, Mysterious, and Surprising Warfare
09-02-2024 . 1k view
-
The "End of Life" for Windows 10: A Massive E-Waste Threat and Sustainable Solutions
08-18-2024 . 969 view
0 feedback