
What Dlemp is and how to install it, you can refer back to the article titled A Guide to Creating a VPS and Installing Management Tools for Website 2020. In this article, I will guide you on how to use it to add a Website and upload its source code.
I. How to use Dlemp
1. Run Dlemp
SSH into VPS with the command ssh root@ip_server or use an SSH support tool such as ZOC Terminal, for example.
If you don't know how to SSH, you can refer to this article of mine:
After successfully SSHing into VPS, you type the command:
dlemp
2. Add a Website on Dlemp
After running the dlemp command, you enter 1. If you already have the source code, you continue to enter 1. If you don’t have the source yet, you can enter the corresponding option according to the Website platform that you want to choose, like Wordpress, Opencart, Joomla....
If you enter 1, then you continue to enter your domain so Dlemp can create a corresponding folder according to the domain name you entered for you to upload your code.
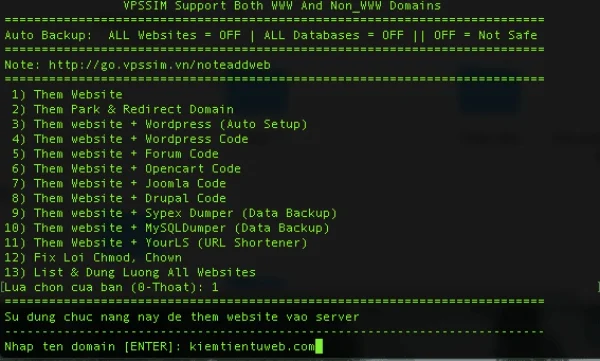
After entering the domain, if your Web is Dynamic Web, you enter y so Dlemp automatically creates a new database corresponding to the domain you entered.
3. Upload code
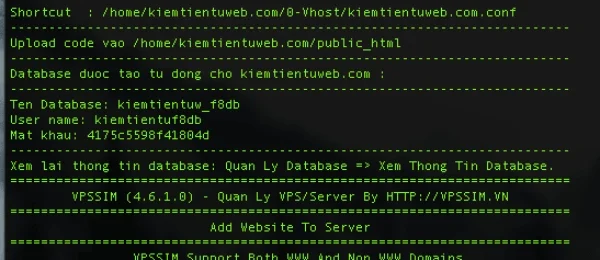
After successfully adding the Website and database, you can upload the code following the path that VPSSIM has guided, which is /home/domain_entered/public_html.
To upload the code, you can download tools like WIN SCP or File Zilla for easy code uploading.
II. Main functions in Dlemp
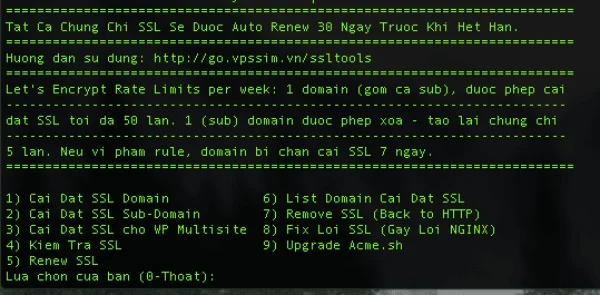
1. Install SSL
Dlemp allows you to directly install free SSL (Let's Encrypt) right on your VPS. You just need to correctly select the option based on the Dlemp version and install, it's very simple.
After setting up SSL on Dlemp, you go to the path /etc/nginx/conf.d, find the config file corresponding to the domain and modify it a bit so your domain would automatically redirect to https. Specifically, you add this section to the file as follows:
if ($http_x_forwarded_proto = "http") {
      return 301 https://$server_name$request_uri;
}

#include /etc/nginx/conf/phpstatus.conf;
include /etc/nginx/conf/drop.conf;
After editing and successfully saving the file above, remember to restart nginx with the following command:
service nginx restart
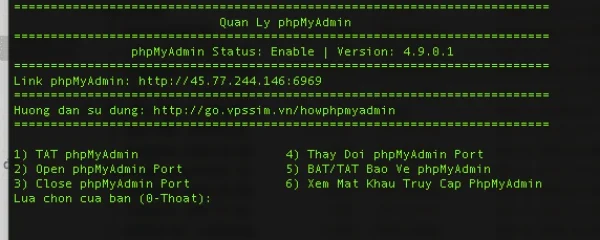
2. Manage phpMyAdmin
If you forgot the phpMyAdmin path, you only need to go to the phpMyAdmin management section.
If your website shows signs of being hacked, you can change the phpMyAdmin port, or if you forget the management password, you can access this section, very convenient.
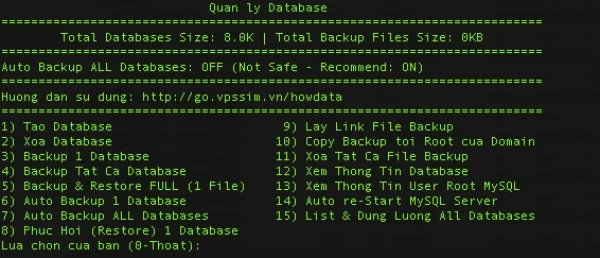
3. Database management
If you want to create a new database, backup or forget the user managing each database, go to this section to retrieve it.
4. Manage FTP accounts
If you want to create an account for someone else to manage a Website in your system, you just need to go to the FTP Management section to create an account.
5. Change PHP and Nginx version
If your website does not run on a certain PHP version, you can go to the Update System (Nginx, PHP...) section to change the PHP version that suits your Website.
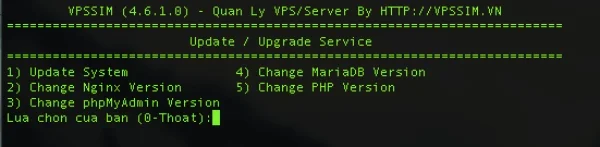
You can also change the Nginx version that suits your Website.
6. Backup and Restore Code
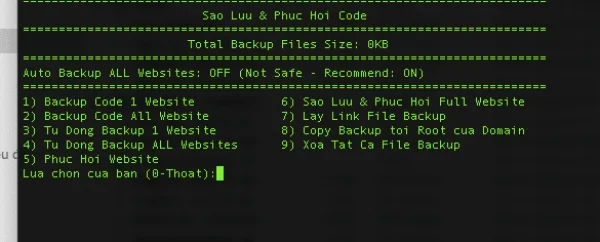
If you want to Backup and Restore the code, go to the Backup & Restore Code section. This section allows you to backup one website or all websites on your VPS, and it also has a feature that allows you to set up automatic daily website backups.
7. Anti-DDOS Website Support
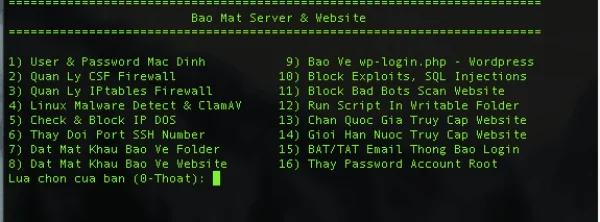
Dlemp supports you to install CSF Firewall to easily block IPs that access your website excessively with bad intentions. Additionally, there are many other features in this section aimed at helping you enhance your website security.
Moreover, there are other features such as support for installing Redis Cache, Memcached, and more ..

Ngọc Phương
Web Developer
Thank you for visiting my blog. My name is Phuong and I have more than 10 years of experience in website development. I am confident in asserting myself as an expert in creating impressive and effective websites. Anyone in need of website design can contact me via Zalo at 0935040740.
Submit feedback
Your email address will not be made public. Fields marked are required *
Search
Trend
-

The most commonly used HTML tags
02-01-2020 . 11k view
-

Websites for earning money at home by typing documents
05-17-2023 . 9k view
-

-

Earn money by answering surveys with Toluna
01-12-2020 . 7k view
-

Guide to creating a database in phpMyAdmin XAMPP
04-25-2020 . 4k view


0 feedback