
phpMyAdmin is a fantastic tool for managing databases, if you're unsure on how to use it, find in-depth instruction below.
I. Get to know phpMyAdmin
1. What is phpMyAdmin?
phpMyAdmin is a tool written in PHP that helps administer the MySQL database through a web interface.
2. phpMyAdmin features
- Manage users: add, delete, modify (assign roles).
- Manage database: create new, delete, modify, add tables, rows, fields, search for objects.
- Import/export data: supports SQL, XML, and CSV formats.
- Execute MySQL queries, monitor the process, and tracking.
- Backup and restore: Manual operation.
phpMyAdmin is quite a handy tool for browsing databases, managing user privileges, and performing SQL queries; moreover, it can be considered a fully-featured administration tool.
3. Limitations of phpMyAdmin
The export/import function of phpMyAdmin is missing a lot of the features you may want:
- Scheduling: With phpMyAdmin, there's no way to auto-export database data.
- Storage media support: Since phpMyAdmin is a web-based software, you can only work with it through a browser. That means you can only save your backups to your local drive available on your system, via your browser's Save As... dialog.
- Compression, Encryption, and other options: Files exported by phpMyAdmin are stored as commonly used text files, without any further processing. Storing in original form takes up a lot of disk space and is not secure.
II. Create a database - phpMyAdmin
1. Create a database
Start XAMPP, click on Start to activate Apache and MySQL.
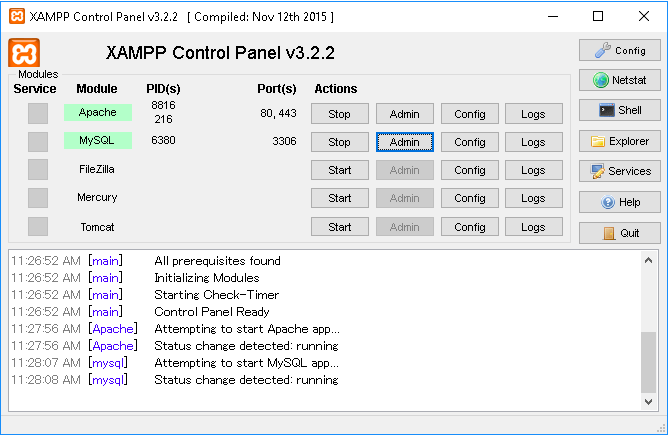
phpMyAdmin is already available in XAMPP, we just need to open the page by clicking the Admin button corresponding to MySQL, the phpMyAdmin interface looks like the picture below.

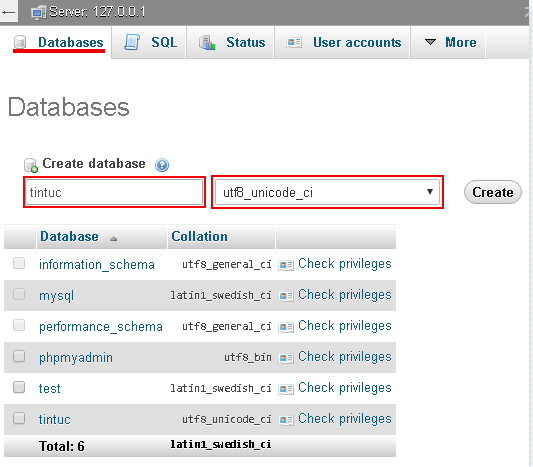
Click on the Databases tab, the database creation screen will appear, on this screen we only pay attention to the Create database section.
- Database name: input the name of the database you want to create, for example: tintuc.
- Collation: select the language display type, you can choose utf8_general_ci.
2. Create user to connect with the database
Normally we can use root username of MySQL to connect database, but for security reasons, we should create a separate user for each database.
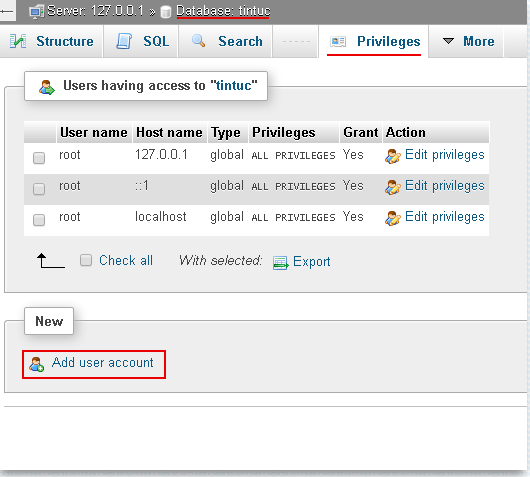
Click on the database named tintuc from the left database list, to perform anything related only to database tintuc.
Select the Privileges tab to create the user.
Click on Add user account to start creating
On the account creation screen, pay attention to the locations marked in the figure:
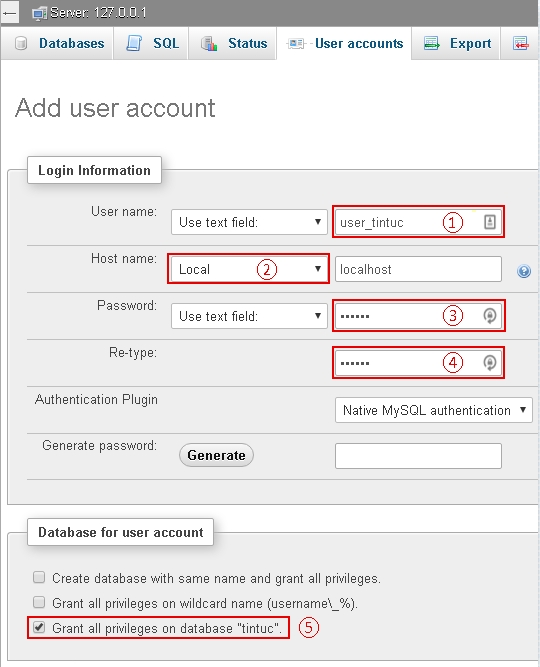
- ①: Set the username, for example user_tintuc.
- ②: Select hostname, usually select local, the rest will automatically display localhost, this option is also suitable for configuring actual servers.
- ③: Set the password, for example, set 12345678.
- ④: Confirm the password, just as above.
- ⑤: Click to create a user for the tintuc database.
Also on the account creation screen, click select Check all to grant access rights to the newly created user, of course, you can also have a separate selection to limit the rights of the user.
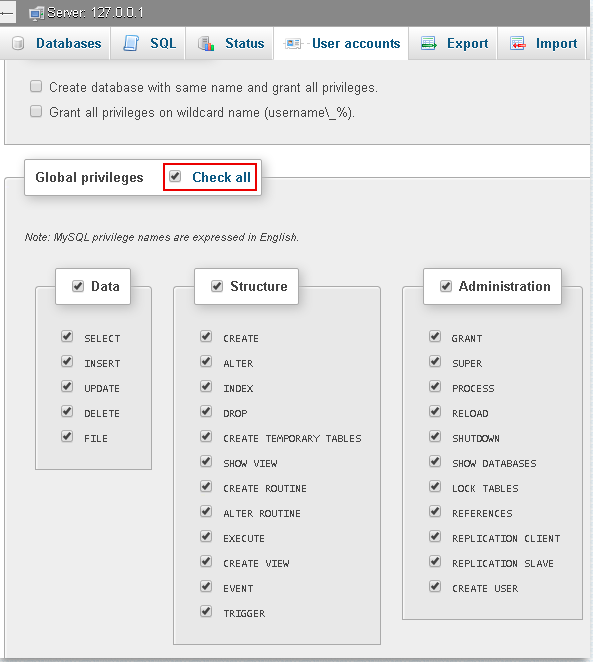
Finally, click the Go button below to finish creating the user

Ngọc Phương
Web Developer
Thank you for visiting my blog. My name is Phuong and I have more than 10 years of experience in website development. I am confident in asserting myself as an expert in creating impressive and effective websites. Anyone in need of website design can contact me via Zalo at 0935040740.
Submit feedback
Your email address will not be made public. Fields marked are required *
Search
Trend
-

The most commonly used HTML tags
02-01-2020 . 11k view
-

Websites for earning money at home by typing documents
05-17-2023 . 9k view
-

-

Earn money by answering surveys with Toluna
01-12-2020 . 7k view
-

Guide to creating a database in phpMyAdmin XAMPP
04-25-2020 . 4k view


0 feedback